<LenearLayout>
단일 방향으로 하위 요소를 정렬하는 뷰 그룹
android:layout_weight : 가중치 할당 (비율)
-
orientation = horizontal & layout_width = "0dp" : weight가 width에 적용 (가로비율)
-
orientation = vertical & layout_height = "0dp" : weight가 height에 적용 (세로비율)
android:weightSum = "5" : 전체 길이의 5등분
- 하위 요소에서 weight = "3" : 5등분 중 3 차지
- gravity : 텍스트뷰가 가지고 있는 "컨텐트"를 어디로 보낼지 정하는 것
- layout_gravity : 부모 클래스 기준으로 어디로 갈지 정하는 것
- gravity = "right|center" : | 기호 사용하여 두가지 속성 적용
<RelaytiveLayout>
"상대적" 위치에 하위 뷰(자식 뷰)를 표시하는 뷰 그룹
-
android:layout_alignParentTop="true" : 이 뷰의 상단 가장자리를 상위 뷰의 상단 가장자리와 일치
-
android:layout_centerVertical ="true" : 이 하위 요소를 상위 요소 내에 세로로 중앙에 배치
-
android:layout_below : 이 뷰의 상단 가장자리를 리소스 ID로 지정한 뷰 아래에 배치 (above : 위)
-
android:layout_toRightOf : 이 뷰의 왼쪽 가장자리를 리소스 ID로 지정된 뷰의 오른쪽에 배치
<FrameLayout>
여러 뷰를 중첩으로 나타내고 싶을 때 사용하는 레이아웃
여러 개의 뷰를 서로 전환할 때 주로 사용
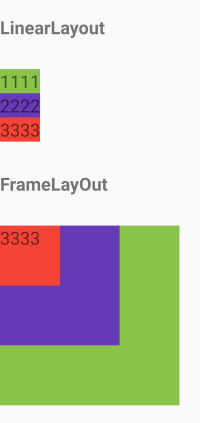
- LinearLayout과 다르게 "겹치기"가 가능
- RelaytiveLayout도 겹치기 가능하지만, 과도 사용시 연산이 많아져 힘들 수 있음
- 먼저 쓴 자식뷰가 제일 아래로 깔린다. (1 -> 2 -> 3)
<TableLayout>
표 형식의 레이아웃
- <TableRow> : 하나의 행
- 셀 : 하나의 열 (하나의 자식뷰)
<?xml version="1.0" encoding="utf-8"?>
<TableLayout
    xmlns:android="http://schemas.android.com/apk/res/android" android:layout_width="match_parent"
    android:layout_height="match_parent">

    <TableRow
        android:layout_width="match_parent"
        android:layout_height="wrap_content">

        <TextView
            android:layout_width="wrap_content"
            android:layout_height="wrap_content"
            android:gravity="center_horizontal"
            android:text="1"
            android:textSize="100dp" />

        <TextView
            android:layout_width="wrap_content"
            android:layout_height="wrap_content"
            android:gravity="center_horizontal"
            android:text="2"
            android:textSize="100dp" />

        <TextView
            android:layout_width="wrap_content"
            android:layout_height="wrap_content"
            android:gravity="center_horizontal"
            android:text="3"
            android:textSize="100dp" />
    </TableRow>

    <TableRow
        android:layout_width="match_parent"
        android:layout_height="wrap_content">

        <TextView
            android:layout_width="wrap_content"
            android:layout_height="wrap_content"
            android:gravity="center_horizontal"
            android:text="4"
            android:textSize="100dp" />

        <TextView
            android:layout_width="wrap_content"
            android:layout_height="wrap_content"
            android:gravity="center_horizontal"
            android:text="5"
            android:textSize="100dp" />

        <TextView
            android:layout_width="wrap_content"
            android:layout_height="wrap_content"
            android:gravity="center_horizontal"
            android:text="6"
            android:textSize="100dp" />
    </TableRow>
</TableLayout>
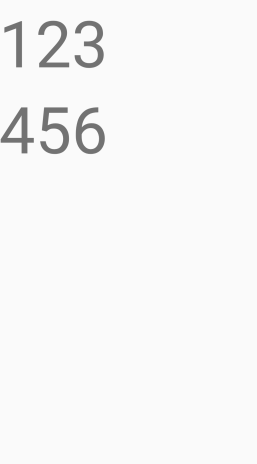
- stretchColumns="*" : 각각의 셀들을 동일한 크기로 변경
<TableLayout xmlns:android="http://schemas.android.com/apk/res/android"
    android:layout_width="match_parent"
    android:layout_height="match_parent"
    android:stretchColumns="*">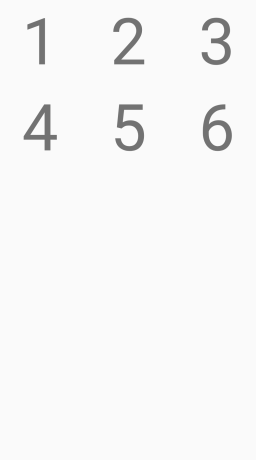
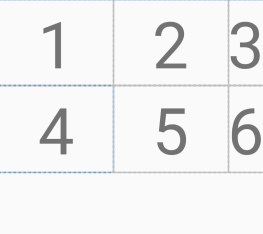
-
stretchColumns="0, 1" : 0, 1, 2와 같은 칼럼 인덱스값을 이용하여 공간 조절 가능
<GridLayout>
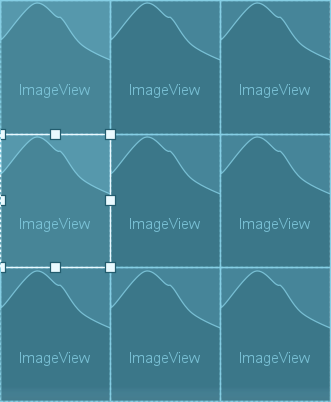
<TableLayout>의 단점을 보완해서 만든 레이아웃
    <GridLayout
        android:layout_width="match_parent"
        android:layout_height="match_parent"
        android:columnCount="3"
        android:rowCount="3">

        <ImageView
            android:layout_row="0"
            android:layout_rowWeight="1"
            android:layout_column="0"
            android:layout_columnWeight="1"
            android:background="#673AB7" />

        <ImageView

            android:layout_width="wrap_content"
            android:layout_height="wrap_content"
            android:layout_row="1"
            android:layout_rowWeight="1"
            android:layout_column="0"
            android:layout_columnWeight="1"/>
       ...

</GridLayout>- columCount, rowCount로 전체 등분
- culumnWeight, rowWeight로 가중치
- row, column으로 요소의 위치 설정
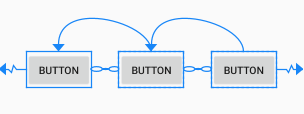
<ConstraintLayout>
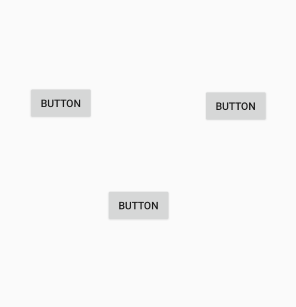
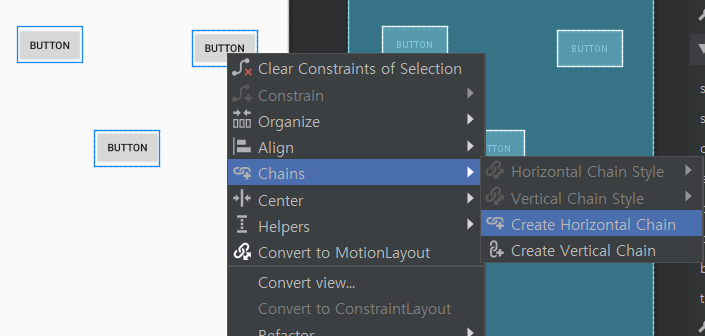
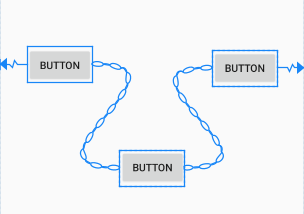
복잡한 레이아웃을 단순 계층 구조로 표현
app:layout_constraintEnd_toEndOf="parent"
app:layout_constraintStart_toStartOf="parent"
app:layout_constraintTop_toBottomOf="@+id/edit_email"
constraint(A)_to(B)Of : 해당 요소의 A 부분을 다른 요소의 B 부분에 연결
A, B : Start, End, Top, Bottom
'Android Developers > layout' 카테고리의 다른 글
| Pallete : Widgets, Containers, Google (0) | 2020.12.02 |
|---|---|
| Pallete : Text, Button (0) | 2020.11.30 |

